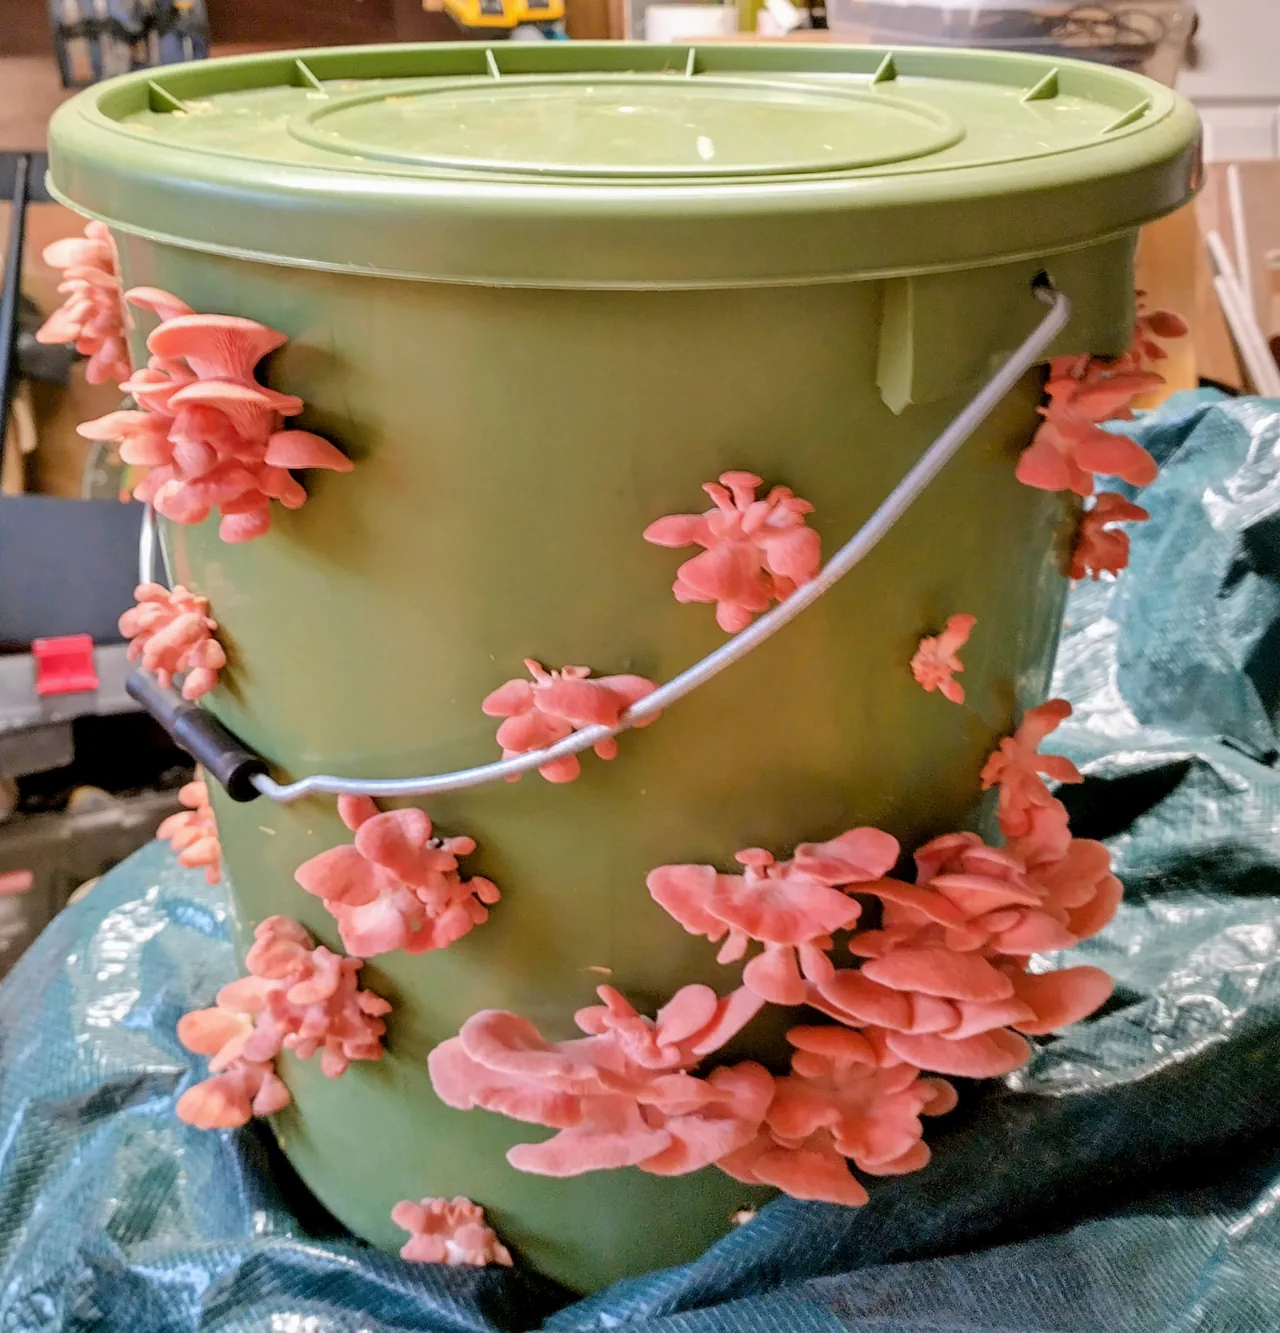
I got 2.4 kilograms of pink oyster mushrooms from a single green bucket. Four flushes, roughly 600 grams each, spread over several months. The whole setup cost me around £40 all-in, took about an hour of actual work (spread across a very eventful morning), and produced more oyster mushrooms than I could eat.
Pink oysters (Pleurotus djamor) are the most visually spectacular thing you can grow at home. They are also, I would argue, the easiest. No garden, no sunlight, no complicated equipment. A bucket, some straw, some spawn, and a drill. The whole process is so satisfying that I am already planning my second bucket — though this time, I will be doing things slightly differently. More on that later.
Fair warning: this guide includes an honest account of what actually happened during my first grow, including a pasteurisation disaster involving my bathtub, a blocked drain, an unimpressed partner, and an emergency trip to Toolstation. If you want a sterile, clinical how-to, this is not it. But if you want to know what really happens when a real person tries to grow mushrooms for the first time, read on.
What You'll Need
- Large bucket with lid (15-20 litre) — mine came as part of a kit from Urban Farm It, but any food-safe bucket will do
- Chopped straw — came with my kit; you can also buy bales from farm shops or pet suppliers and chop it yourself
- Pink oyster mushroom grain spawn — again, Urban Farm It supplied this. Fresh spawn is important — it does not keep well at room temperature, so plan your timing
- Drill with a 10mm bit — for making the fruiting holes. Mine came with the kit
- Thermometer — for checking straw temperature after pasteurisation. Not strictly essential, but it saves a lot of guesswork and anxiety
- Isopropyl alcohol in a spray bottle — for sanitising surfaces. Optional but recommended. Do not spray it in an enclosed space and then breathe in deeply, as I discovered
- Somewhere warm and dark-ish — a workshop, garage, airing cupboard, or spare room at 20-25°C
Step 1: Drill Your Bucket
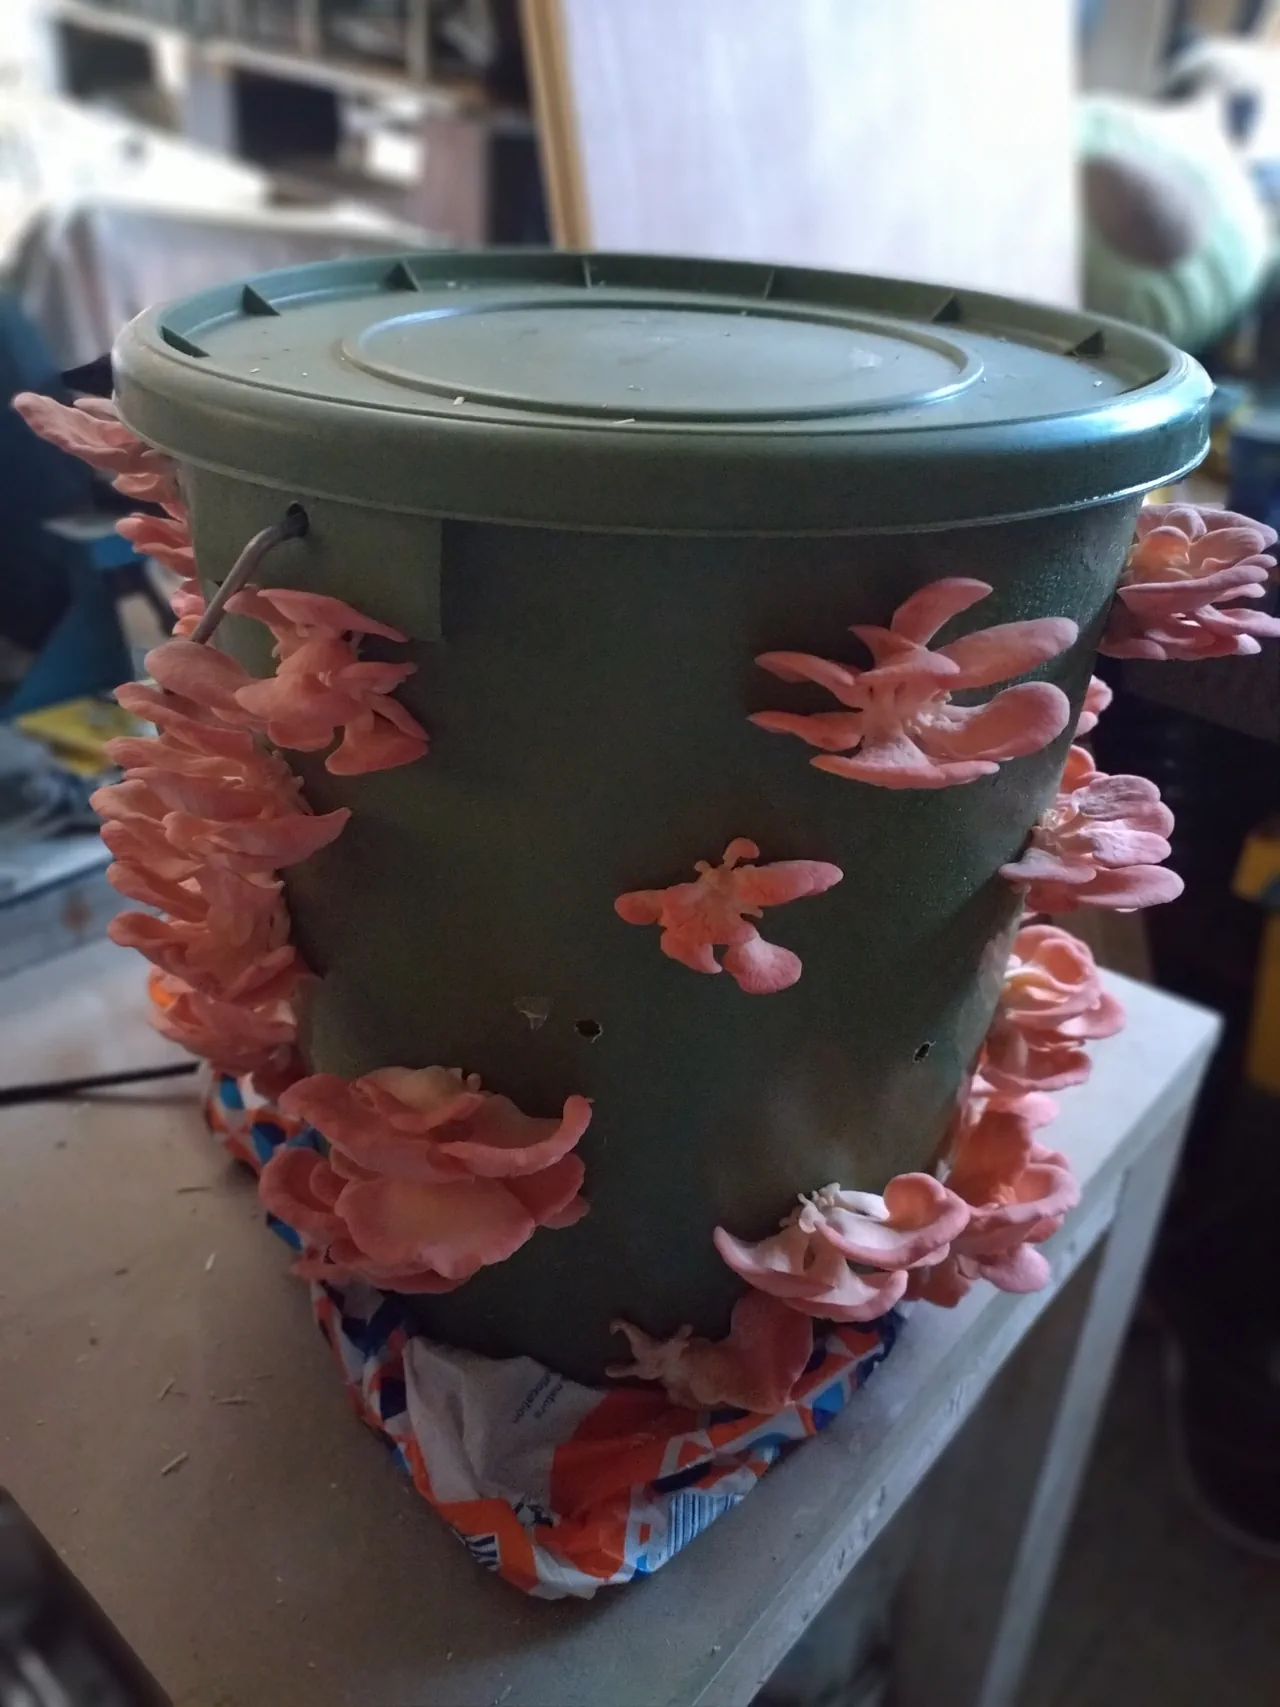
Take your bucket and drill 10mm holes all over it in a scattered pattern. I definitely drilled too many holes — or at least, I thought I did at the time. Looking at the photos now, every single hole produced a fruiting cluster, so perhaps “too many” is not actually a thing. I would say I had holes roughly 5-8cm apart, scattered across the full height of the bucket, with no particular pattern to them.
The bottom third of the bucket seems to produce the biggest clusters, possibly because gravity draws moisture downward. The holes near the top produced smaller clusters but still fruited reliably. If I were doing it again, I might experiment with different hole densities — but honestly, the chaotic approach worked brilliantly.
Step 2: Pasteurise Your Straw
This is the step where you kill off most of the competing organisms in the straw, giving your mushroom spawn a head start when you introduce it. The process itself is simple: soak the straw in hot water (70-80°C) for at least an hour, then drain it and let it cool to below 25°C before you add the spawn.
Simple in theory. In practice, this is where my first grow went slightly sideways.
I decided to pasteurise the straw inside the bucket itself, which seemed logical at the time — the straw is going in the bucket anyway, so why dirty another container? I packed the straw in, filled it with water that was just off boiling (around 80°C), put the lid on, and left it overnight.
Eight hours later, I got up early to check on it, fully expecting it to have cooled to a nice, spawn-friendly temperature. It had not.
The centre of that straw was still easily 50°C. And this is the bit I should have predicted, because in my professional life as an energy assessor, I have always been fascinated by straw bale buildings. Straw is an extraordinary insulator. I know this. I have literally assessed buildings insulated with the stuff. And yet somehow, when I packed a bucket full of straw and poured boiling water into it, I was surprised that it retained heat overnight.
The problem was that I needed to inoculate the straw that day. The spawn instructions said to store it at 10-15°C, and my fridge runs at 5°C — too cold. I did not want to risk damaging the spawn by leaving it another day. In hindsight, it would probably have been fine, but in the moment, I panicked.
The Bath Incident
My cunning plan to speed up the cooling: spread the straw out in the bath. Maximum surface area, rapid heat dissipation. Brilliant.
First, I sterilised the bath with isopropyl alcohol, poured into a plant mister and sprayed liberally around the tub. Two things I learned from this: (1) isopropyl alcohol is extremely effective as a surface sanitiser, and (2) do not spray it as a fine mist in an enclosed bathroom and then inhale deeply. I nearly gassed myself before the straw even made it out of the bucket.
Once I could see straight again, I dumped the hot straw into the bath and spread it out. The plan was working. Heat was dissipating. The straw was cooling beautifully. I reckoned I had a solid hour before my partner got up, and while she might not be delighted to find the bath full of straw, she would be fine once I had cleared it all away.
I had roughly thirty minutes of quiet, productive straw-cooling before she appeared in the bathroom doorway.
She had an important thing to get to. She needed the bath. Urgently. The bath was full of straw.
I apologised profusely and shovelled everything back into the bucket as fast as humanly possible. It was probably just about cool enough by this point, but maybe not quite. I was also slightly worried about contamination from all the faffing around — but at this stage, getting the bathroom back was the priority. I cleared up, gave the bath a quick wipe, and retreated.
At which point she started screaming from the bathroom because the bath was filling up with water when she turned the shower on.
It turns out that when you drain pasteurising water from a bath full of straw, a truly impressive amount of tiny straw fragments get pulled into the plughole. Even though I had used the plug guard and thought I had cleaned up perfectly, I had completely blocked the drain. Water was pooling around her feet and rising steadily.
One emergency trip to Toolstation later — still in my dressing gown, buying a drain unblocker at 8am on a Saturday — I had the drain flowing again. She was not especially impressed. The straw, meanwhile, was still too warm. So once the bathroom crisis was resolved, I sterilised the bath again, put the strawback in the bath, and this time saw the cooling through properly before anyone else needed to shower.
Why Imperfect Pasteurisation Actually Helps
Here is the genuinely interesting science I picked up from all this chaos. Pasteurisation and sterilisation are not the same thing, and the difference actually matters for mushroom growing.
Sterilisation kills everything. Pasteurisation kills most things but leaves some hardy organisms alive. When I was panicking about my disrupted pasteurisation process — all that moving straw in and out of baths and buckets — I assumed I had ruined everything. But the results suggest the opposite.
Think about it this way: if you create a perfectly sterile substrate, you are also creating a completely open playing field. The first aggressive contaminant that lands on it has no competition at all. It can colonise freely and outcompete your mushroom spawn.
But with pasteurisation, some organisms survive — the heat-resistant ones, which tend to be relatively benign. When you introduce your mushroom spawn into this environment, it does not face a single dominant competitor. Instead, there are several organisms already present, keeping each other in check, and your spawn can establish itself alongside them rather than fighting off a single aggressive intruder.
My messy, interrupted, bath-disaster pasteurisation produced four strong flushes with no visible contamination. Sometimes good enough really is good enough.
Step 3: Layer and Inoculate
Once your straw has cooled to below 25°C (use your thermometer — do not guess, as I very nearly did), you are ready to build your bucket. The process is simple: alternate layers of straw and grain spawn, pressing each layer down firmly to remove air pockets.
I broke the grain spawn up by hand, wearing gloves and misting everything with isopropyl alcohol as I went. Coming from a scientific background, I can tell you that after the pasteurisation circus that had just unfolded, this was not in any meaningful sense a sterile procedure. But I did my best.
Start with a layer of straw at the bottom, then scatter a good handful of broken-up spawn across it, then another layer of straw, more spawn, and so on. I did about 6-8 layers of spawn in total, pressing down quite firmly between each one. The kit came with enough straw for two grows, but I ended up using about 70-75% of it in this one bucket — so I packed it considerably denser than the instructions recommended. Whether this contributed to the extraordinary yield or whether I just got lucky, I genuinely do not know. It would be interesting to try a second bucket with less spawn and looser packing to compare.
Finish with a layer of straw on top. Put the lid on firmly.
Step 4: The Waiting Game
I put the sealed bucket under the worktable in my workshop, inside a black bin bag with another black bin bag over the top to keep it dark during colonisation. The workshop is unheated, so the bucket was just at whatever the ambient UK temperature happened to be at the time — not the 20-25°C that the instructions recommend.
About a week later I checked on it and discovered I had not drained the pasteurised straw nearly well enough. The bin bag was full of water halfway up the bucket. I emptied the water out, poked some drainage holes in the bin bag, and left it to get on with things. Another item for the “what I would do differently” list: drain the straw much more thoroughly before layering.
Now here is the bit that will test your patience. The instructions said to expect pinning within a couple of weeks. I waited. And waited. After the expected colonisation period, I took the bucket out of the bin bags, put it in indirect light, and started misting it a couple of times a day as instructed. Nothing happened. Not for one week, not for two, not for three.
I was 3-4 weeks past the expected timeline and had essentially given up. I assumed the chaotic pasteurisation, the interrupted cooling, the waterlogged bin bag, the unheated workshop — one or all of it had done for the spawn. I was still misting out of habit more than hope.
Then one day I walked into the workshop and there were pins everywhere.
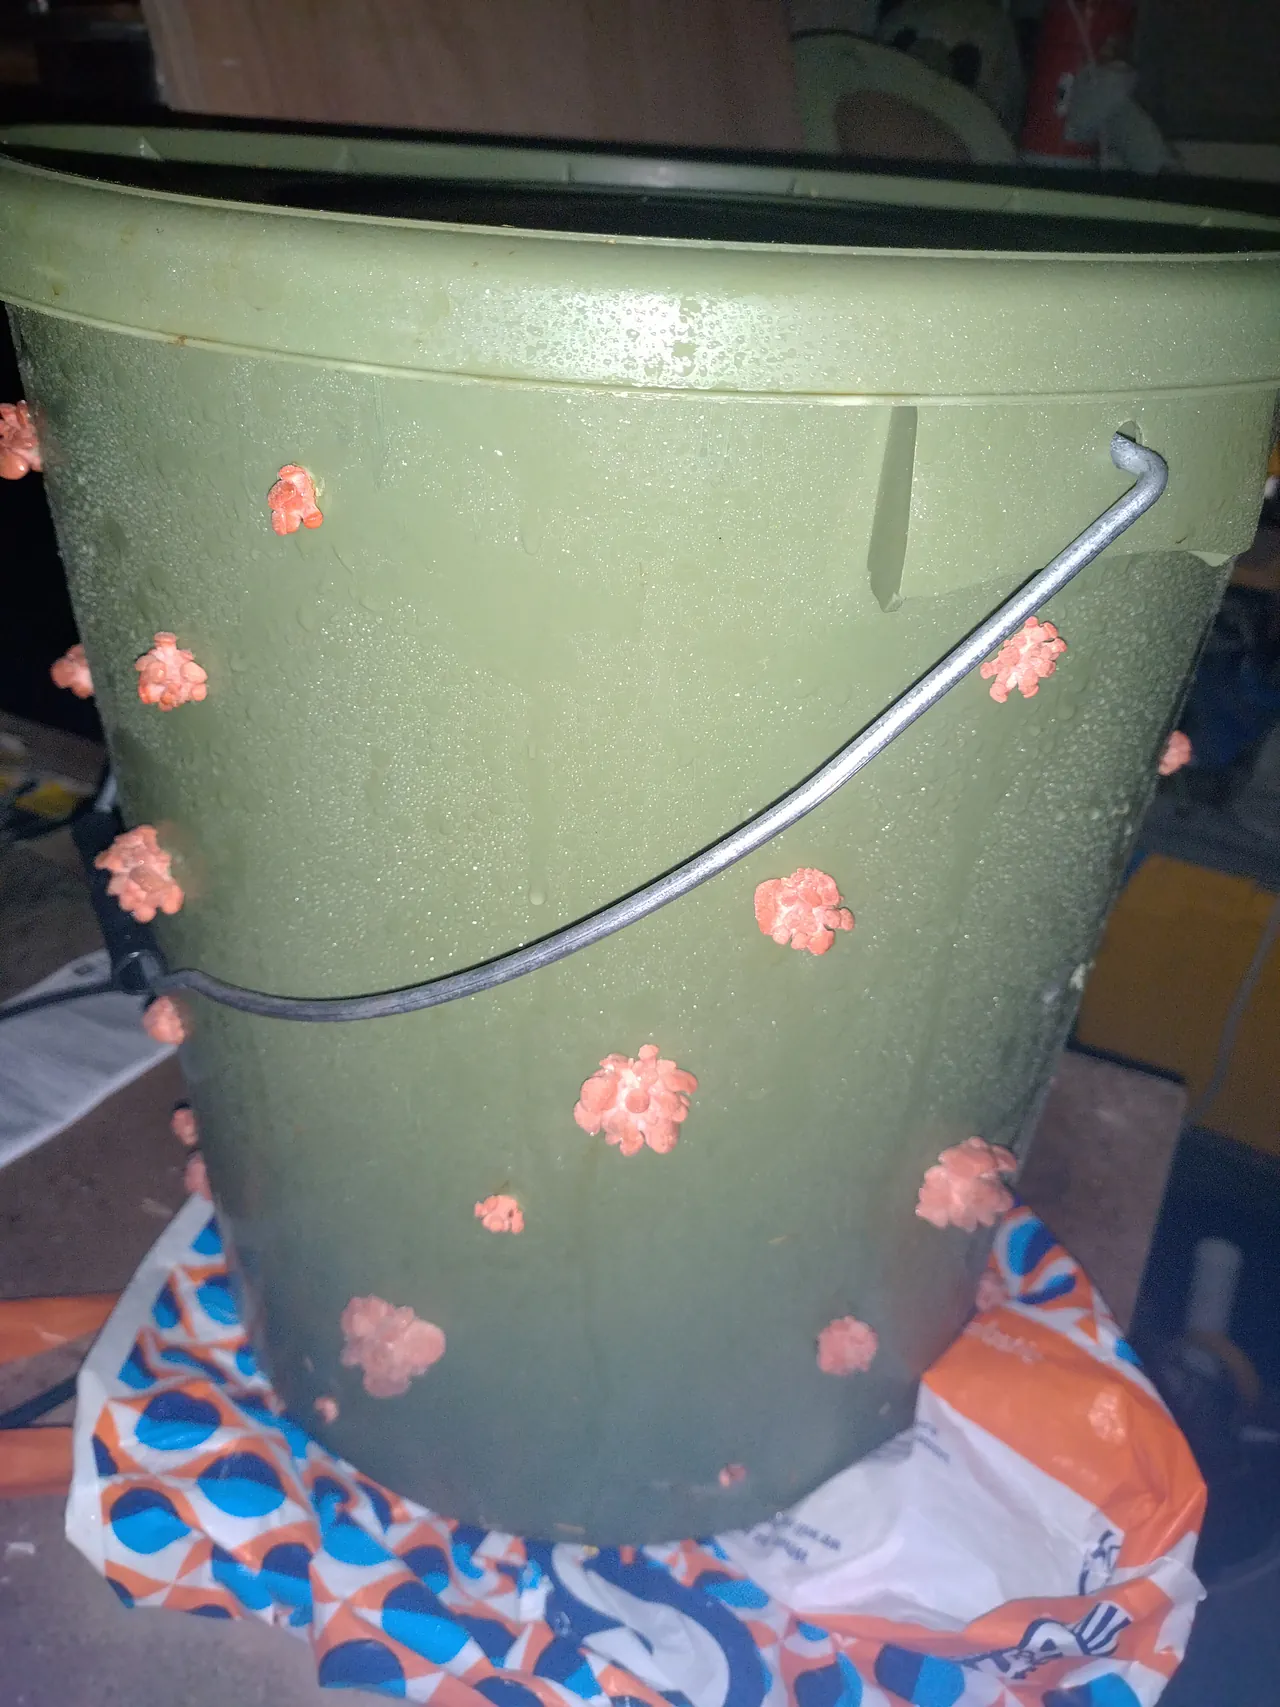
The lesson here is simple: do not give up. The timelines on the instructions assume ideal conditions — warm, consistent temperatures. If your workshop, garage, or spare room is cooler than 20°C, colonisation will take significantly longer. That does not mean it has failed. Keep misting, keep the bucket in indirect light, and be patient. The mycelium is working — it is just working slowly.
Step 5: Harvesting
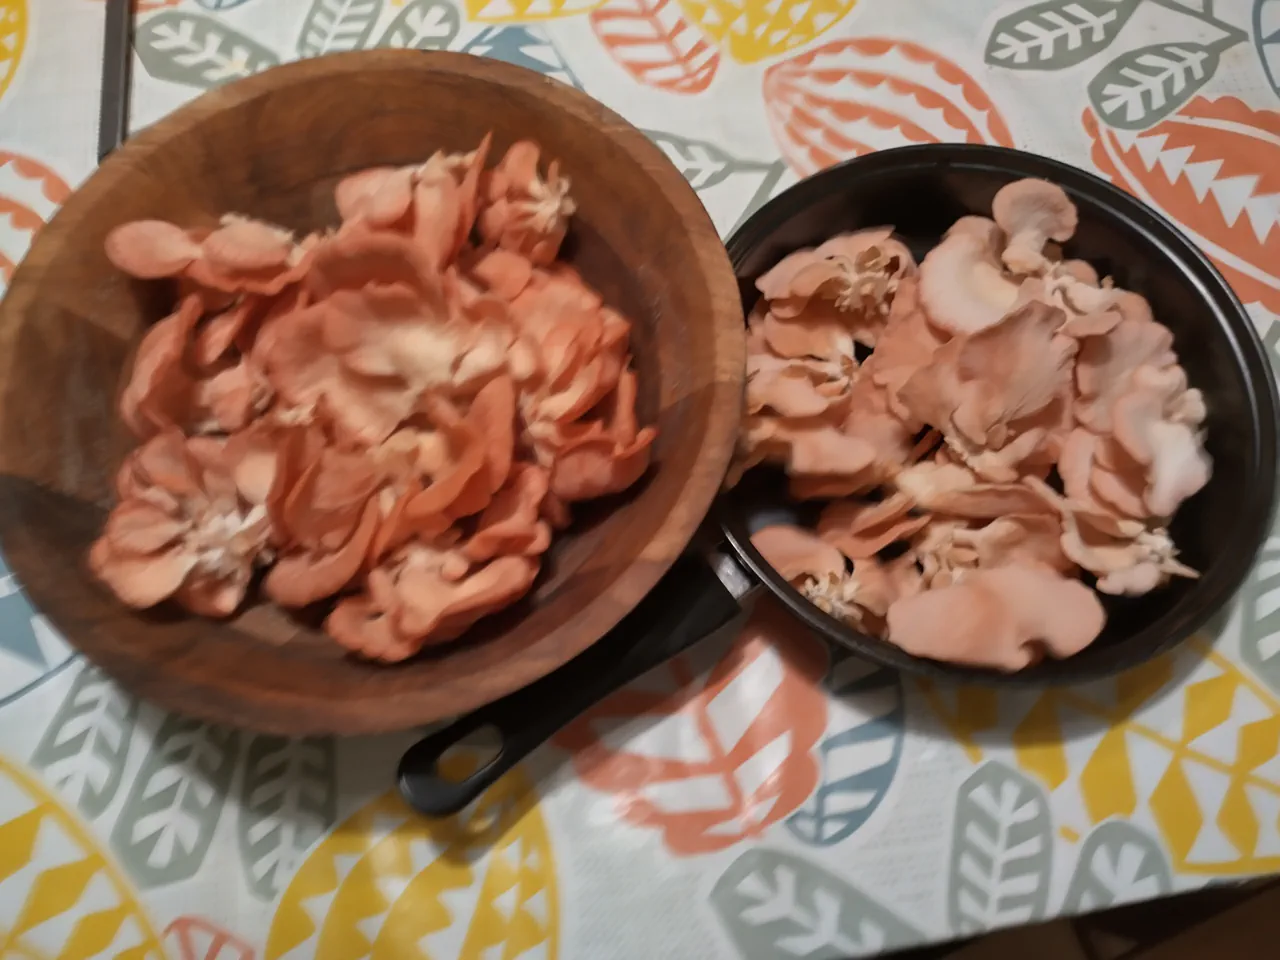
Once the pins appear, things move fast. Within 5-7 days you will have full-sized clusters ready to pick. The optimal harvest time is when the caps are still slightly curled — before they flatten out completely and start dropping spores.
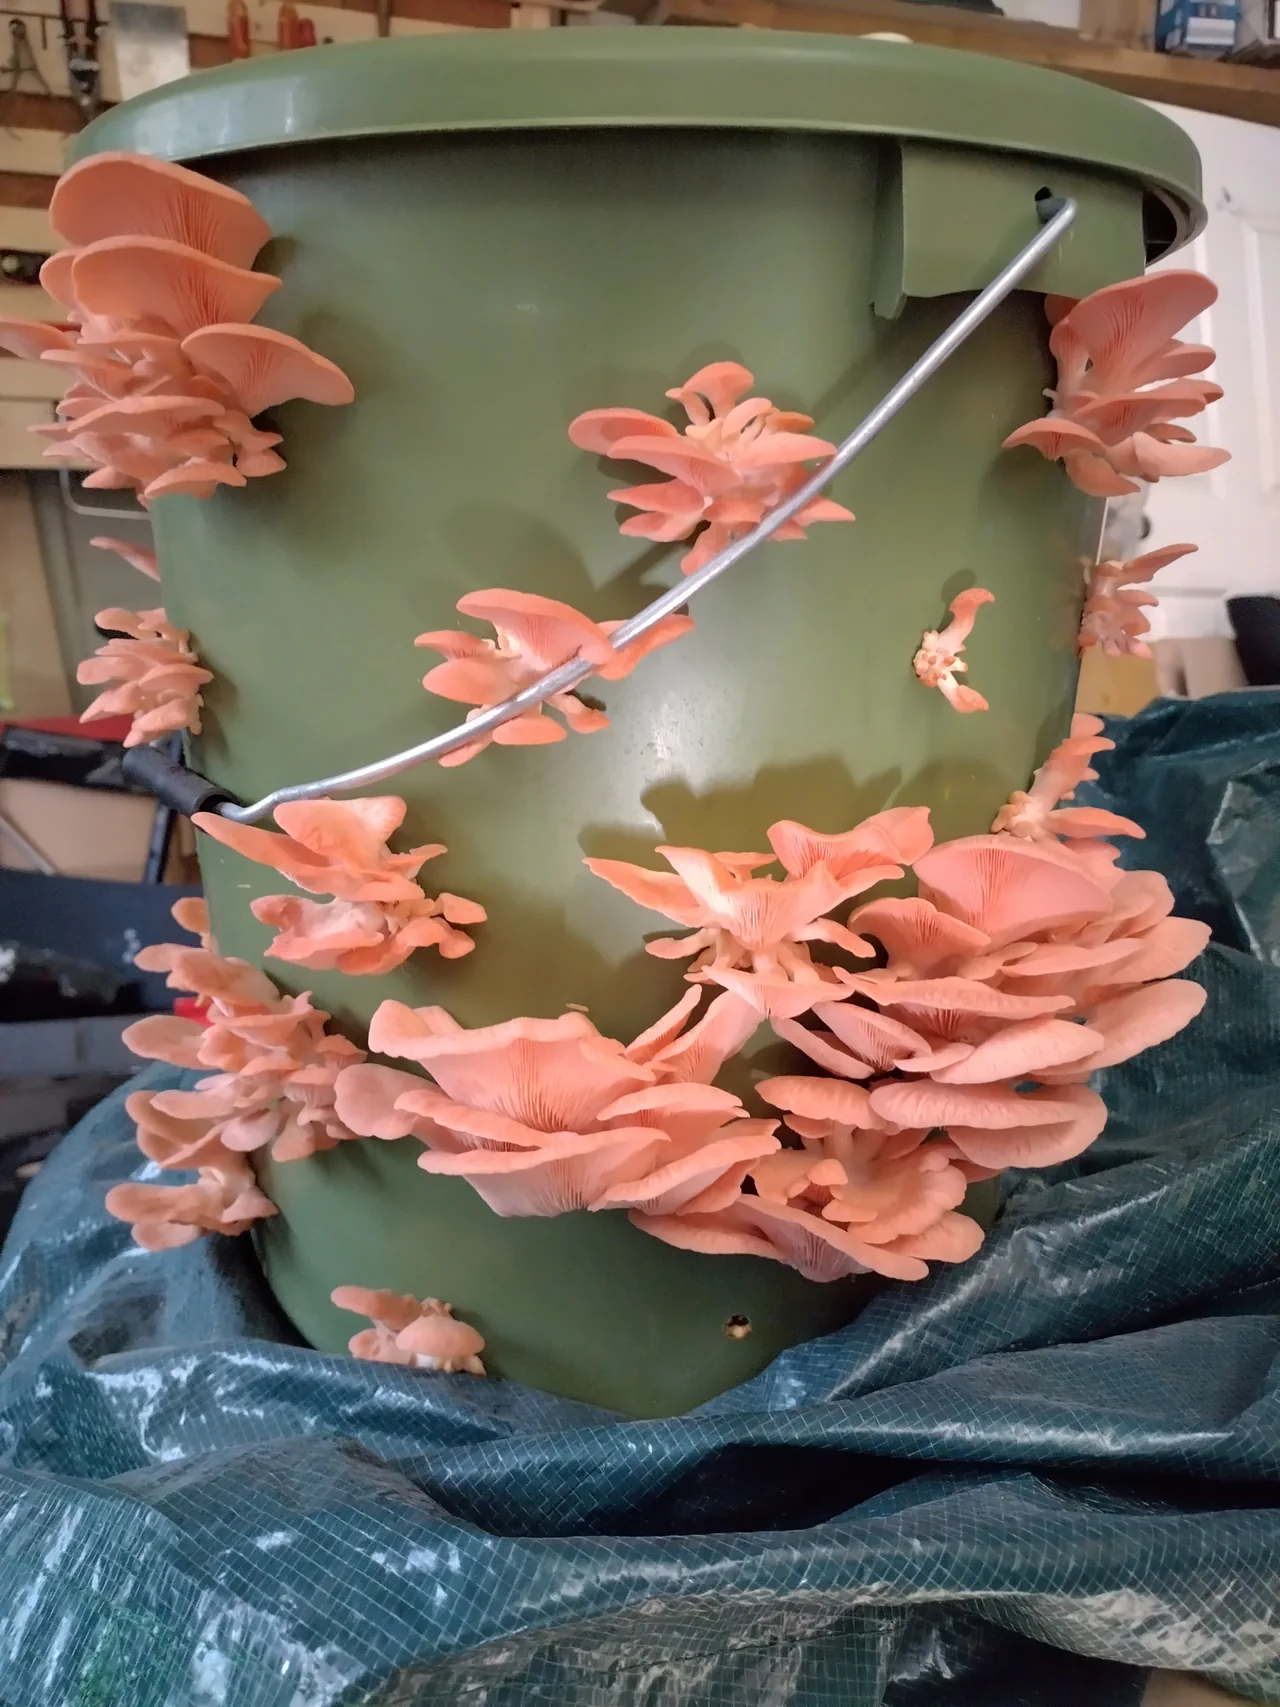
To harvest, grip the base of each cluster and twist gently. The whole cluster should come away cleanly. Do not cut individual mushrooms — take the whole cluster at once for the cleanest break and the best regrowth potential.
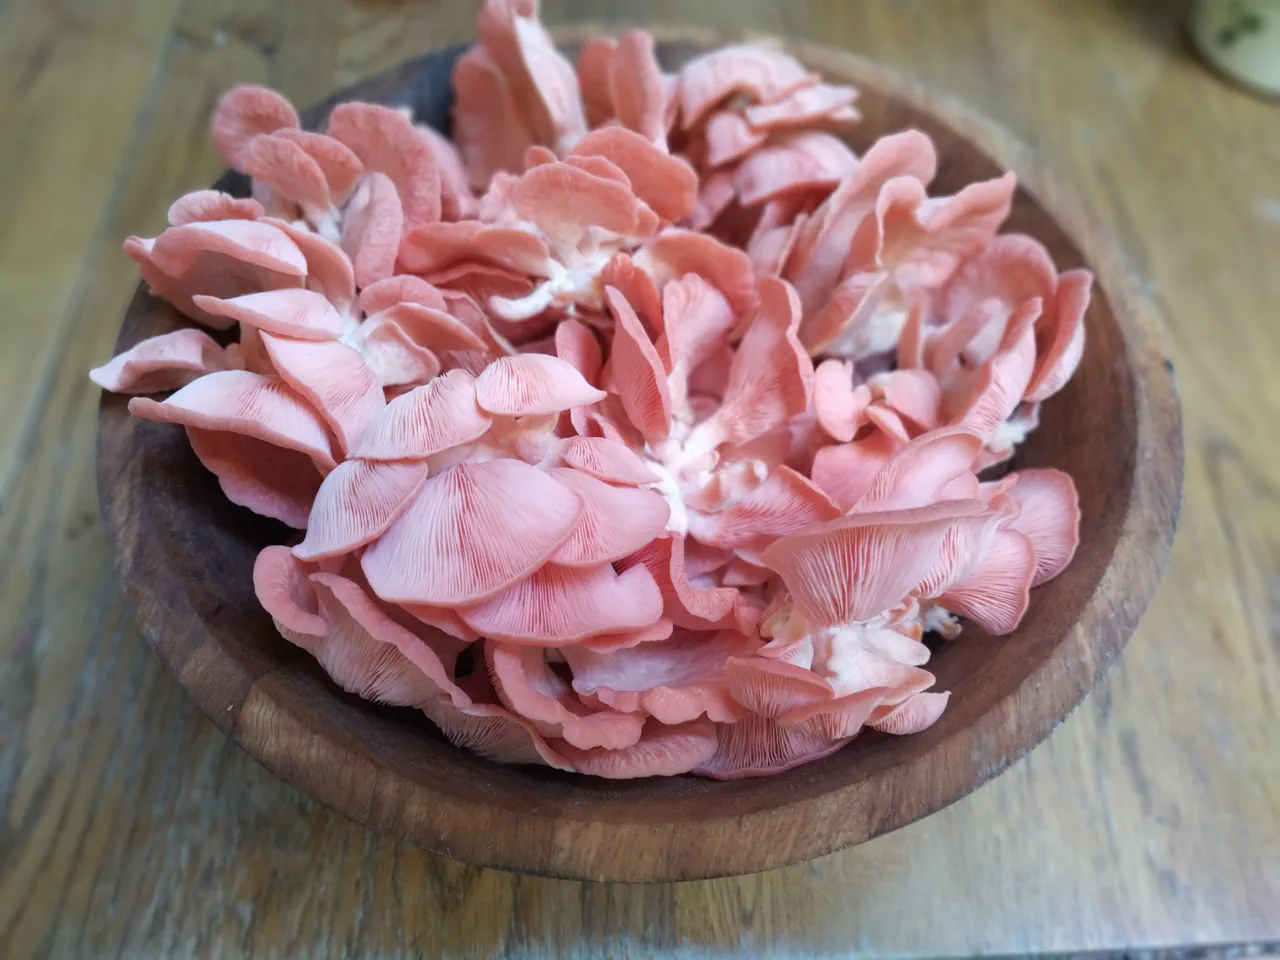
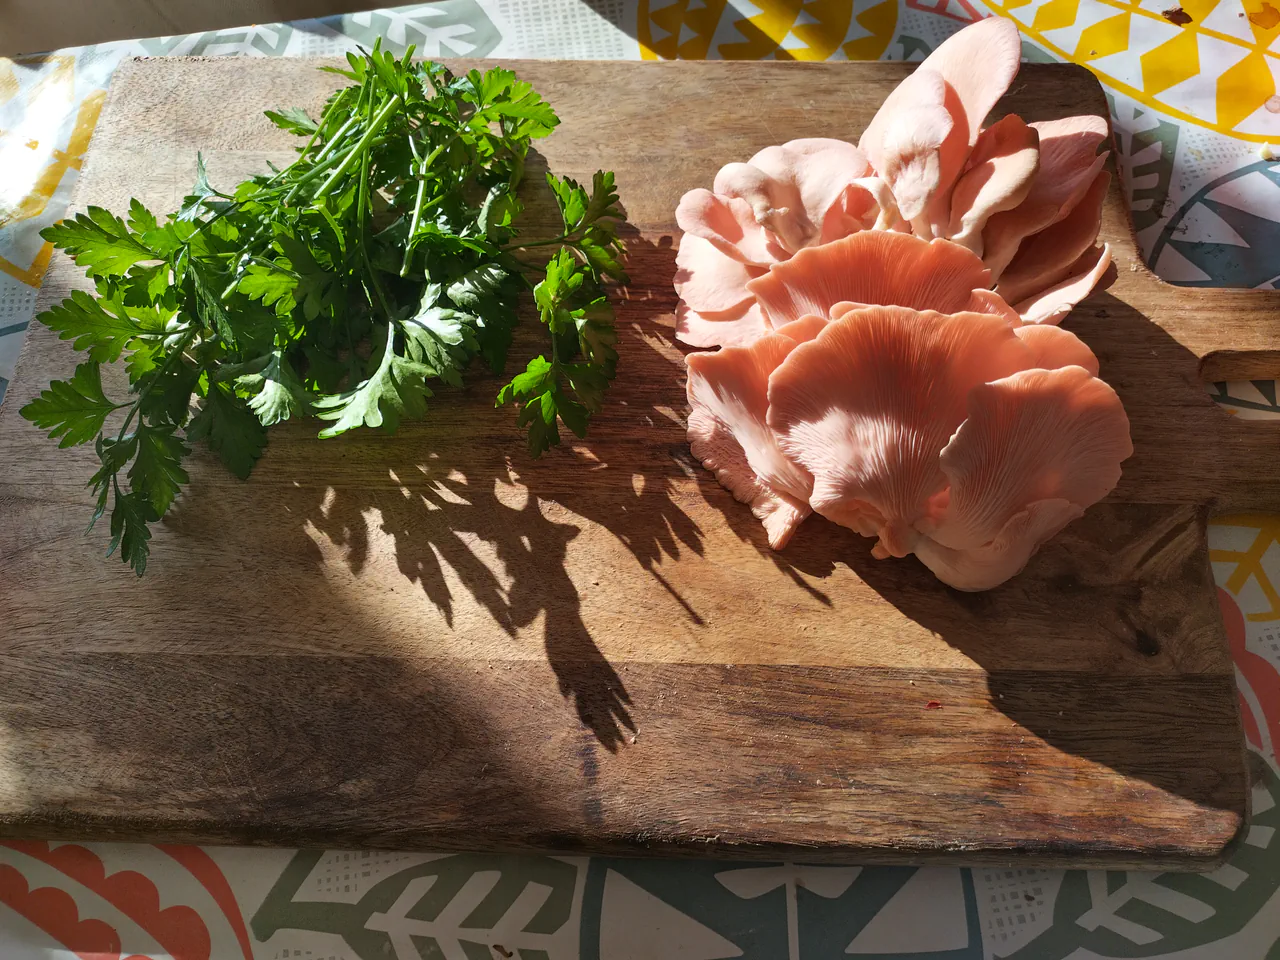
The Colour Change — and Why It Matters
One of the most fascinating things about pink oysters is how dramatically the colour changes with maturity. Early harvest gives you that stunning vibrant coral-pink that looks almost unreal. Leave them a day or two longer and they shift to a deeper salmon-orange with earthier tones.
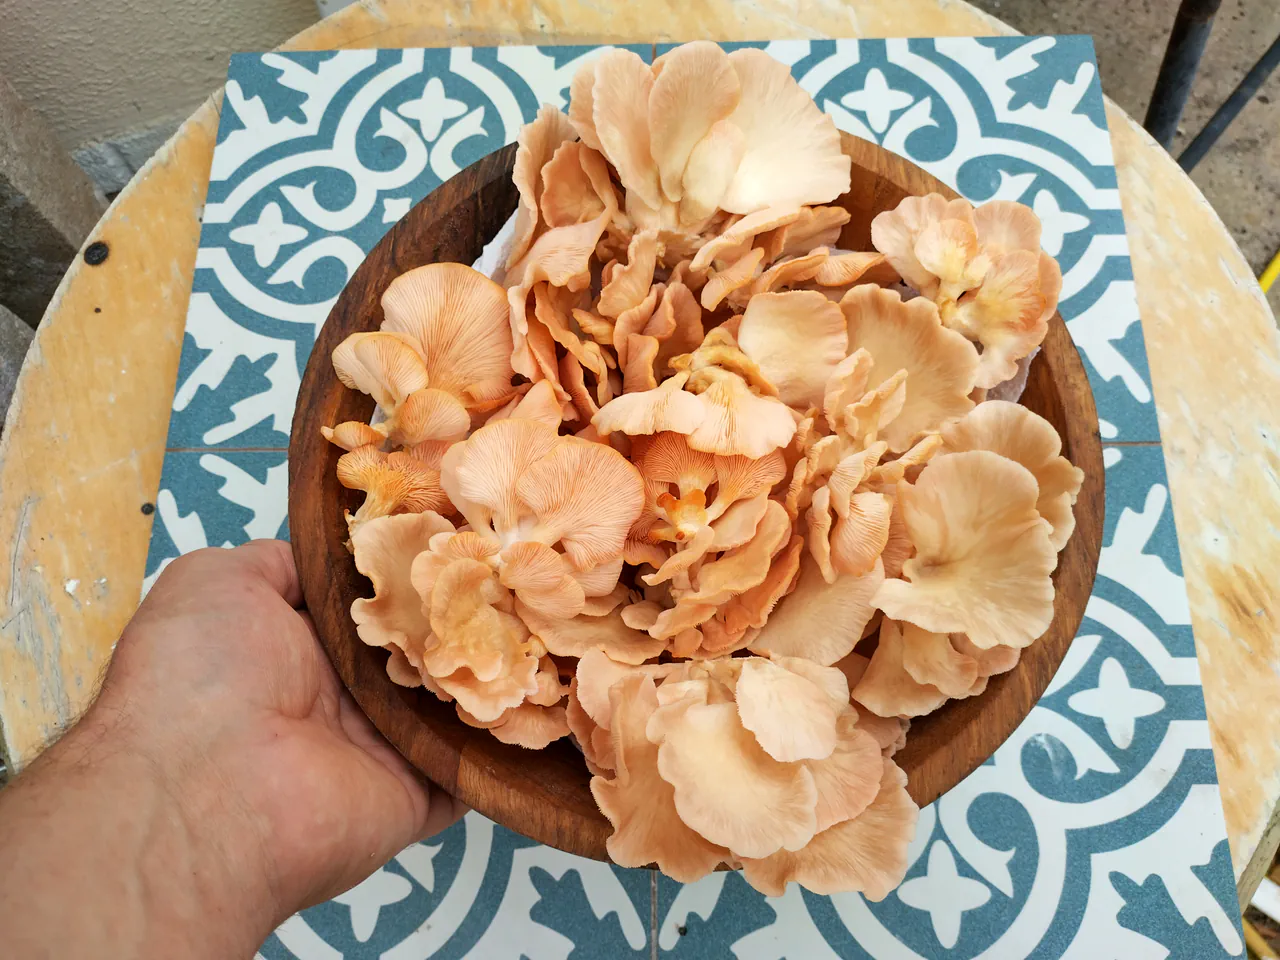
Here is the interesting bit: I actually preferred the flavour of the slightly more mature, orange-toned mushrooms from the second flush. They had more depth, more earthiness, more of that umami richness that makes oyster mushrooms so good in stir-fries. The young pink ones are prettier, but the older ones taste better — at least to my palate. Something to experiment with on your own grow.
Getting Multiple Flushes
After your first harvest, the mycelium is far from done. I got four full flushes from my bucket, and the yield barely dropped between them. Each flush produced around 600 grams — roughly 2.4 kilograms total. That is an extraordinary amount of food from a bucket of straw.
Here is the bit that surprised me most: I never soaked the bucket between flushes. A lot of guides recommend submerging the bucket in cold water for a few hours after each harvest to rehydrate the substrate. I did not do this. After the initial pasteurisation soak, no more water was added — I just misted the bucket a couple of times a day.
For the second flush, I was fairly diligent with the misting and the pins came back noticeably quicker than the first time — a few weeks rather than the agonising months of waiting. By the third flush, I will be honest: I had sort of forgotten about the bucket. Life got in the way, the misting became sporadic, and the bucket ended up pushed into a corner of the workshop. I assumed it was done.
Then I walked past it one day and there was a full flush of mushrooms growing out of it. About 600 grams, completely unattended. The fourth flush was even more ridiculous — I had genuinely forgotten the bucket existed for about a month, and when I moved some things around in the workshop I found it covered in mushrooms again. Another 600 grams.
Cost and Quality
| Item | Cost |
|---|---|
| Urban Farm It starter kit (bucket, straw, spawn) | ~£30 |
| Isopropyl alcohol spray | ~£3 |
| Drain unblocker from Toolstation | ~£4 |
| Total investment | ~£40 |
| Total yield (4 flushes) | ~2.4kg |
| Equivalent shop cost (oyster mushrooms ~£18/kg) | ~£43 |
So on materials alone, it is cheaper than buying the equivalent weight of quality oyster mushrooms. But what about your time? The pasteurisation, the drilling, the misting, the emergency trip to Toolstation in your dressing gown — if you costed all that at an hourly rate, the numbers would look different. Here is the thing though: that time is not a cost. Growing your own food is immensely enjoyable. The morning you walk into the workshop and find mushrooms erupting from a bucket you had given up on — that is not labour, that is one of the best moments of your week. So the economics are genuinely complex: cheaper on materials, priceless in enjoyment, and the quality is in a category of its own.
Because supermarket oyster mushrooms were picked days ago. They have been packed, chilled, transported, and sat under strip lighting. They are fine. They are functional. But they are a shadow of what a pink oyster mushroom actually tastes like when you twist it off the bucket and drop it in a hot wok five minutes later. The picking-to-pan time of a few minutes gives you flavours that simply are not there in any purchased product, however supposedly fresh. That is something no amount of money can buy in a shop.
Subsequent grows are even cheaper — you already have the bucket and spray, so you only need fresh straw and spawn (around £15-20). But honestly, even if it cost more, I would still do it. The taste is that good, and the growing is that satisfying.
What I'd Do Differently
- Pasteurise outside. This is the big one. A clean dustbin in the garden, started early in the morning, with the whole day ahead for cooling. No baths, no drains, no angry partners. Outside.
- Do not panic about the spawn. The instructions say store at 10-15°C, and my fridge is at 5°C. I convinced myself this was a crisis. In reality, grain spawn is reasonably resilient and a few extra hours in a cool room would have been absolutely fine. The panic led directly to the bath incident, which led to the drain incident, which led to Toolstation in my dressing gown.
- Allow more cooling time. Straw is an insulator. I know this professionally. I apparently forgot it temporarily. Give yourself at least twice as long as you think you will need for the straw to cool to under 25°C.
- Drain the straw much more thoroughly. A week after inoculation I found the bin bag full of water halfway up the bucket. The straw was nowhere near drained enough when I layered it. Next time I will leave it draining for several hours before it goes near the spawn.
- Experiment with packing density. I used 6-8 layers of spawn and packed the straw down firmly — significantly denser than the instructions suggested, using about 70-75% of the kit straw in one bucket instead of the intended two grows' worth. It worked brilliantly, but I am curious whether less spawn and looser packing would produce comparable results. The only way to know is to do a side-by-side comparison.
- Experiment with hole density. My chaotic drilling pattern worked brilliantly, but I am curious whether fewer, larger holes would produce bigger individual clusters. Science demands a follow-up.
- Pick some mushrooms later. The flavour of the more mature, slightly orange mushrooms was genuinely better. Next time I will harvest half the flush early (for looks) and half late (for flavour) and compare properly.
Frequently Asked Questions
How long do pink oyster mushrooms take to grow?
In ideal conditions (20-25°C), the instructions say 2-3 weeks from inoculation to first harvest. In practice, if your growing space is cooler — an unheated workshop or garage, for example — it can take significantly longer. My first flush took 3-4 weekslonger than the kit instructions suggested, because I was growing at ambient UK temperatures rather than the recommended 20-25°C. Do not panic if nothing happens on schedule. Once pins finally appear, harvestable mushrooms develop within 5-7 days — they grow remarkably fast in the final few days, so check daily.
Can you grow pink oyster mushrooms outdoors in the UK?
Pink oysters are tropical mushrooms that prefer 20-30°C, so they are best suited to indoor growing in the UK — a workshop, garage, airing cupboard, or spare room works well. They need indirect light (not direct sunlight) and fresh air exchange. During a warm summer you could grow them in a sheltered outdoor spot, but you will get more reliable results indoors where you can control temperature and humidity.
How many times can you harvest from one bucket?
You can realistically expect 3-4 flushes (harvests) from a single bucket before the mycelium exhausts the nutrients in the straw. Each flush should give you 400-600g depending on your bucket size and conditions. The yield per flush may gradually decrease, though in this grow all four flushes produced roughly 600g each — around 2.4kg total from a single bucket that cost about £40 to set up.
How much does it cost to grow oyster mushrooms at home?
All-in, my first bucket cost about £40 — the kit (bucket, straw, spawn), isopropyl spray, and an unplanned drain unblocker. That is roughly what you would pay for 2.4kg of shop-bought oyster mushrooms, so the cost saving is marginal at best. The real value is quality: mushrooms picked minutes before cooking have a flavour and texture that nothing from a supermarket shelf can match. Subsequent grows are cheaper — you already have the bucket and spray, so you only need fresh straw and spawn (around £15-20).
Grew this? Cook this